Word is a word processing software developed by Microsoft Corporation. Word is packed inside the MS Office package, when you download and install the MS Office package, the software for MS Word also gets installed and ready for use.
MS Word provides various kinds of features that help you in creating reports, documents, biography more efficiently and faster. AutoCorrect is a proofing feature in Word that was originally designed to replace misspelled words as you type.
AutoCorrect can be used to insert copyright, trademark, emoji symbols, and so forth by typing some text. For example, typing (c) AutoCorrect feature will automatically replace it with a copyright symbol i.e., ©.
Using AutoCorrect, you can insert several lines of text as well as different symbols in your document.
In this post, we are going to learn how to create your own AutoCorrect entries and remove an AutoCorrect entry.
How to Create AutoCorrect Entry in Word?
To create an AutoCorrect Entry, first, type several lines of text or insert a symbol. Select the text or symbol and then open the Word Options dialog box.
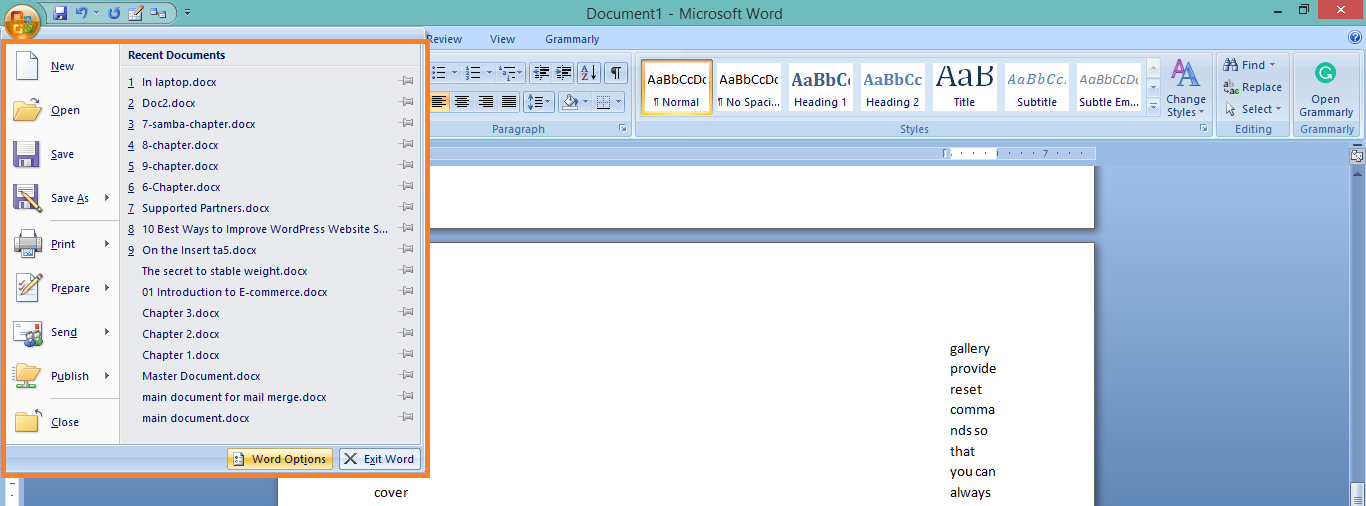
Open the Word Options dialog box in MS Word by clicking the File Menu or Office button which is located to the left of Tabs. In MS Word 2007, when you click the Office button following interface will be shown:
Clicking the “Word Options” button will open a dialog box where you will find different settings and options. Here select the “Proofing” from the list of options available in the left pane. Next, click the “AutoCorrect Options” button in the “AutoCorrect Options” group.

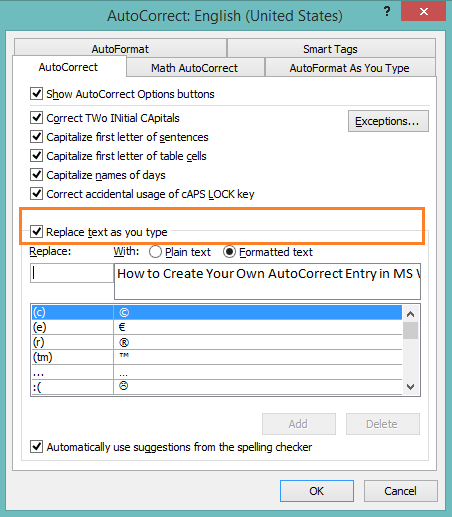
Once you click the “AutoCorrect Options” button the AutoCorrect Options dialog box will open.
Before replacing the several lines of text or a symbol with another text, make sure the “Replace text as you type” option in the AutoCorrect Options dialog box is checked.
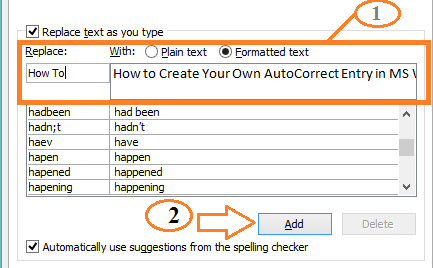
Now the final step is to replace the text or symbol you have selected with a word or phrase. In my case, I am going to replace the text that I have selected with “How To”. Click the “Add” button when ready.
You’ll see your custom list will be shown in AutoCorrect entries. Similarly, you can select any symbol and add it in AutoCorrect entry by replacing it with a word or phrase.
Now when I type the word “How To” in Word, the AutoCorrect feature will automatically replace the word “How To” by “How to Create Your Own AutoCorrect Entry in MS Word”.
How to Remove AutoCorrect Entry in Word?
Deleting autocorrect entries is just as simple as creating them. Go to “AutoCorrect” dialog box by clicking the File >> Word Options >> Proofing >> AutoCorrect Options button.
In the AutoCorrect list, scroll down to find the entry that you have previously created. The entries are sorted in alphabetical order so jump to the correct alphabet.
Once you find your own custom AutoCorrect entry, select the entry and click the “Delete” button.

Conclusion:
I am sure you have followed every step that I have covered in this post for creating and deleting an AutoCorrect entry. Be careful while deleting the custom entries because if you accidently delete a default AutoCorrect entry then the AutoCorrect won’t correct the misspelled words as you type.
If you have any queries regarding this post, then feel free to mention your query in the comment box.